Sunday, 16 June 2013

My Father's Hands

My father is a super-hero. Possibly wolverine, but if he hadn't had the adamantium thing. Or the claws. Okay, mostly I'm referring to his unbreakability. 

Dad has been in car accidents, he was hit by a train, he's fallen through ice more than once, survived a plane crash up north, and just generally rocked more situations I can count that literally had other people panicking and mentally saying goodbye to their loved ones. Dad is amazingly unflappable. He stays calm, does what needs to be done to make sure that he and everyone else in his care stay safe and unharmed. 

One of my favourite Dad-survival stories is the one about how he lost his pinkie finger. 

When I was about 7, we lived on a cattle ranch in the absolute middle of nowhere in Manitoba. One day, Dad was out in one of the back paddocks dealing with a bull. Said bull was not being co-operative in the slightest, but Dad managed to get a rope on him. He had the rope wrapped around his hand, which he later said he knew was a damnfool thing to do, but seemed to make sense at the time. Unfortunately, the damn thing then ran around a pole, creating a very useful pulley effect. One more heave from the bull and pop! off came Dad's pinkie. 

Of course, he was way far out in the paddocks and then had to drive himself all the way back to the house, with his hand out the window to keep it above his head and also to keep from bleeding all over the truck. 

I don't actually remember this day, but I do remember when he came back from the hospital and I saw that his finger was half-gone. I remember seeing his stitches and hearing the story and thinking "Wow. My dad's a super-hero."

And that's never changed. Dad recently had his shoulder replaced and my husband was way more worried about the surgery than I was. When he asked my why I wasn't worried about my dad having this fairly significant surgery, I stopped to really examine my feelings. They boiled down to this: I truly believe that my father is invincible. And I was pretty much proved right when the surgery went perfectly and, at his first recovery check-in, Dad was healing much faster and much better than the doctors were expecting (despite another run-in with a bloody cow, this one involving a wall). 

So there you have it.  Happy Father's Day, Dad. You're my hero.


Friday, 14 June 2013

From the Ashes of Disaster (Gluten-Free Bread)

Today (yesterday, actually) I decided to try making gluten-free bread. I'm not celiac, nor do I have any allergy, but I do have some health issues my doctor thinks might be helped by cutting back on gluten. And being an obsessive baker, I've been wanting to try making it for a while.

I decided to simply convert my favourite bread recipe, which may not have been the best idea. I realize now that most of what makes this bread awesome comes directly from the gluten, but hey! I love experimental baking. 

It started off well enough, the flour looked nice. 


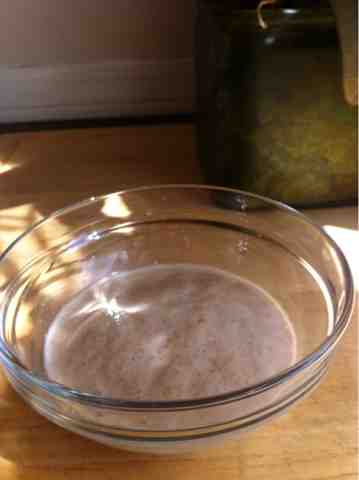
Mmm, yeast....


The resulting dough was much more cake-like than bread-like, but I figured I'd just go with it. Into the oven (with just the light on) overnight with you!


Next morning it looked... Exactly the same. This does not bode well.


Oh well. I'll just bake it anyway! What's the worst that could happen? ....time to take the lid off, let's see what mess I've got here. What's this?


It worked! It puffed up! I appear to have achieved bread! Fantastic!


Final verdict: I'm not impressed. I'm not really keen on the flavor. Or the texture. This gluten-free thing is going to be really difficult.... I think I'll definitely try another, actual, from-someone-who-knows-what-they're-doing recipe before I give up, though. And the kids seem to like it, so there's that. 

3 cups all-purpose GF flour
3 tsp xanthan gum
1/4 tsp yeast
1.5 tsp salt
1.5 cups water

Mix flour, xanthan gum, yeast and salt in a medium sized bowl.

Add flour, mix well. 

Cover bowl with Saran Wrap and leave in a warm place for 12-18 hours. (Note: this had virtually no effect on the dough, so may not be necessary. But it was in the original, so I've kept it here)

Scrape dough out onto a piece of parchment paper, knead gently a few times and then shape into a round. Lift the dough and parchment into a clean bowl, let sit for 1.5 hrs. 

After 1hr, place a clean Dutch oven in the oven and start preheating to 500 degrees. After half an hour, move the dough and parchment paper to the Dutch oven. Cover with the lid and return to the oven. 

Bake at 500 degrees for half an hour. Remove lid, reduce oven to 450 and bake for another 15-25 mins. 

Remove from oven, remove from Dutch oven and cool on a wire rack. 

Sunday, 2 June 2013

Diaper delivery day! (Diapers, of course)

Friday was diaper delivery day. A friend had a little boy in march and she asked if I was interested in making her some cloth diapers. It just so happened that I had recently discovered a diaper pattern that I really really like. It's from Fabricland, part of their new Babyville Boutique line. I have to say they are the only diapers that I have made that when put on Willow don't immediately start leaking. They are super-cute, too.


No tutorial today, just pictures. The pattern gives me license to make and sell (on a small-scale) the diapers, but I certainly can't make the pattern available on the Internet for free! 

I love the leg-openings. The stuffers agitate out in the wash, it's great!


I will say, though, that although the finished product is fantastic, the pattern instructions leave a little to be desired. They use photos instead of technical drawings (like most paper patterns use) and the photos are not especially clear. This is not a beginner pattern. As such, if you have the pattern and are having problems with it, shoot me a line and I'll help you if I can. Maybe I'll do a diaper tips post...

Same pattern, different fabric. These were for my sister!


Sooooo many snaps....


Saturday, 25 May 2013

Getting Ready for Summer (Aladdin pants)


I rarely sew for myself. It's one of those mechanic's-car-never-runs, plumber-has-leaky-faucets type of things. When I'm making something for myself (ergo, not getting paid or having someone depending on me) I have no sense of urgency. I tend not to finish the things I make for myself, leaving them unhemmed, closed with safety pins instead of a hook and eye (that's literally true. I made a skirt and wore it for years without putting a hook and eye on it). I also never make anything fussy or complicated for myself. I tend to make very simple, utilitarian things I don't need a pattern for, like circle skirts, tunic tops, and pyjama pants.

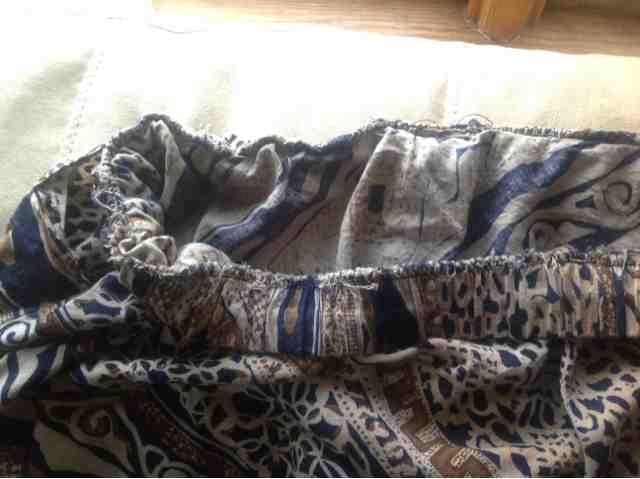
This is my latest simple-but-great project. These pants are insanely comfortable and really, quite simple. They are a style that is actually quite ancient, being essentially the first pants every designed. They originated in Persia, which is why Aladdin wears them. They cover more than a skirt while at the same time being very good hot-weather pants. Lots of airflow.

I'm not going to attempt to post a pattern for two reasons: 1) I don't have one and 2) you don't need one. You can easily draw everything on the fabric.

You will need a square of whatever fabric you want. Light cottons, rayons and silks (if you're feeling fancy) are the best. Polyester would work fine as well, the key here is lightness. You want the fabric to be very drapey and floaty. Depending on the width of your fabric, you will need different lengths. So if your fabric is 115cm wide, you need 115cm in length (though most fabric stores only cut on the 10s, so you'll likely need to get 120cm). Keep in mind that the wider the fabric is, the longer the pants. If you're a bigger person like me, you probably won't be able to get anything longer than shorts and you may run into trouble with the smaller-width fabrics.

Okay. Tutorial time:

Measurements needed: Your hips at their widest point; your waist where you want the pants to sit; and your calf at its widest point.

1) Fold the fabric in half diagonally, then in half again bisecting the right angle.

2) Math time! To find the length that you measure down to create the waistline, take your HIP measurement and Divide it by 1.6, then divide it in half. The equation is r= (HIP/1.6)/2.

So let's say your hips are 100cm. 100/1.6 = 62.5

Divided in half again, and we have 31.3cm

3) Pivoting on the top corner, measure down your r from one side of the angle to the other. Cut along the line you've just drawn


4) At the other corner, find a place where the distance between the two sides is equal to half your calf measurement. I like to put a curve in this, but you don't have to. A straight line works fine as well. Cut along this line.


5) With right sides together, sew your side seams from the waist opening to the leg opening, using 1/4" seam allowance.

6) Cut 3 strips of fabric 2 times the width of your elastic + 1" wide (if your elastic is 1", cut the strip at 3"). You need one the length of your hip measurement + 1" and two the length of your calf measurement +1". Sew the ends of each together to make a circle.

7)  Cut 1 piece of elastic 1" shorter than your waist measurement and 2 pieces of elastic 1" shorter than your calf measurement. Sew the ends of each together to make a circle.

8) Fold the fabric circles in half over the elastic circles, pin at the quarters. (The fabric circles will be bigger than the elastic circles.) Sew the fabric together, encasing the elastic. Stretch the elastic as you go. These are now your waistband and leg bands!

9) Attach the waistband and leg bands to the pants, stretching the elastic in the casing.


And you're done!


I hope this makes sense! If you try these, please leave a comment and let me know what needs clarification.

Thursday, 16 May 2013

A Living Flame (Pictures)

I was recently asked to make a custom dance costume for a local dancer. I've known this girl since she was about 10, and she is a seriously accomplished dancer, so I was rather chuffed to be able to do it. I also really enjoy making stretch wear. It was one of my favourite classes at University and it's something that I don't get a lot of opportunity to do. I had hoped that when I did the costumes for The Little Mermaid last fall (that post will happen someday) that I would be able to draft the bodysuits, but there ended up being about 30 of them needed, so it just didn't happen.

Brenna had a very interesting concept for her solo this year: a flame. Unfortunately, she couldn't find anything in the dance wear catalogues that looked the way she wanted, so she asked me to design and make her something. This is how it turned out.


The dance was very cool, too. She did extremely well in competition, and one of the adjudicators even wrote on her sheet "Fantastic Costume!" I'm really proud.

Tuesday, 14 May 2013

Tea Time! (English muffins)

I found this recipe in one of my favourite cookbooks, a British book called Baking: a Common Sense Guide. There's a whole series of them, we have Cooking and 30-Minute Meals. They are great cookbooks, with lots of interesting recipes. The only downside has been that they do a lot of measuring by weight. However, I recently got a very nice kitchen scale so that's not a problem any more! Woo!


So. I figured, English cookbook-English muffin recipe. Must be a good one! And they weren't bad.


However, they weren't what I think of as English muffins. I would say they were excellent flat white buns. They did end up crisp, which was nice, but they were lacking in the bubbly, full-of-holes-to-catch-the-butter-ness that I associate with English muffins. Granted, I've never had anything but store-bought before, so I don't know what "real" ones are supposed to be like, but I was a bit disappointed with these.

Willow was fascinated by the mixer. So am I, usually
I did some more reading and discovered that many people cook these on a griddle. Maybe I'll try that next time. 


On the plus side, they were the perfect size to make tiny sandwiches for the kids, so despite my disappointment they got eaten up pretty quick!

Note: I took all the pictures for this one with my phone, sorry about the terrible quality...

ENGLISH MUFFINS


Preparation time 20 minutes +
Total cooking time 15 minutes
Makes 15

Ingredients:
 2 teaspoons dried yeast
1/2 teaspoon sugar
530 g (1 lb 3 oz/41/4 cups) plain (all-purpose) flour
350 ml (12 fl oz) lukewarm milk
1 egg - lightly beaten
40 g (11/2 oz) butter - melted

1. Lightly dust two 28 x 32 cm baking trays with flour.
2. Put the yeast, sugar, 1 teaspoon of the flour and 60ml (2 fl oz/1/4 cup) warm water in a small bowl and mix well. Leave in a warm draught-free place for about 10 minutes, or until bubbles appear on the
surface. The mixture should be frothy. If your yeast doesn't foam, it is dead.
3. Sift the remaining flour and 1 teaspoon salt into a large bowl. Make a well in the centre and add the milk, egg, butter and yeast mixture all at once. Using a flat-bladed knife, mix to a soft dough. (I used my mixer with a dough hook. Maybe that's why they weren't bubbly, perhaps?)
4. Turn the dough onto a lightly floured surface and knead lightly for 2 minutes, or until smooth. Shape the dough into a ball and place in a large, lightly oiled bowl. Cover with plastic wrap or a damp tea
towel (dish towel) and leave in a warm place for 11/2 hours, or until well risen.
5. Preheat the oven to 210°C (415°F/Gas 6-7). Punch the dough down and knead again for 2 minutes, or until smooth. Roll to 1 cm (1/2 in) thick, then cut into rounds with a lightly floured plain 8 cm
(3 1/4 in) cutter and place on the trays. Cover with plastic wrap or a damp tea towel and leave in a warm, draught-free place for 10 minutes.
6. Bake for 15 minutes, turning once halfway through cooking. Transfer to a wire rack to cool. Serve warm or cold.

Source- Baking: A Common Sense Guide

Saturday, 11 May 2013

My Mother's Hands

I have my mother's hands. I have all my life. Those five words have defined the part of my body I see the most, use the most, for as long as I can remember. They are not what are typically thought of as beautiful hands. They are not "elegant", nor do they have "long, slim fingers tipped with pale ovals of fingernail." I read that phrase once and it always stuck with me. For some reason I always imagine those hands playing piano effortlessly.

No, my hands are large. They are square. The fingers, though long enough, are not slim. The nails are round and flat and look terrible when I have tried to grow them long. I keep them short, rarely extending beyond the tips of my fingers. I do love to paint them, though, and I try to keep them nice. Just like my mother's.


My mother's hands are immensely strong, or at least they have always seemed so to me. We used to hold hands sometimes in the car and I would inevitably start the "interlocking fingers and squeezing" game of chicken. I always, always lost. I tried it again not too many years ago and learned, much to my chagrin and despite the fact that I am a good 6" taller than Mum and outweigh her by more that I like to think about, she is still significantly stronger than me.

My mother's hands are the hands I try to emulate when I make bread. It doesn't matter the videos I watch or the articles I read about kneading, I always end up moving the dough the way I remember her moving it. My mother's bread is amazing, and always has been. I think this is partly why I get such warm fuzzies when my house smells like bread.


My mother's hands made all my dance costumes, most Hallowe'en costumes, skating costumes and a good many pieces of clothing. She gets frustrated when she sews, but she certainly can do it. She is creative, though sometimes (rather like me) she doesn't see that.

My mother's hands cook. They cook effortlessly (or so it appears), they cook inventively and they cook amazingly. A lot of people will, when they make a recipe they had as a child, say to others "But it's not as good as my mom's." Believe me when I say I have a significantly higher peak to scale to reach that pinnacle than others. My parents instilled in me a love of - and interest in - good food that I share with my husband and hope to pass on to my children. I dream of one day making my mother's spaghetti carbonara and having it be "right." Someday. I hope.


I am proud of my hands. They may never feature in a magazine; they may never effortlessly play the piano; they may chap, and have hangnails and the nails may get dry and crack when I'm sewing a lot, but they are mine. They hold my children. They put the ring on my husband's hand. They make bread I am proud of. They sew, draw, dye, sand: they make the things I imagine come to reality. They were there to catch my daughter when she started walking. They clap when my son stands on the couch with his ukelele and serenades me. They are supportive, and gentle and strong. Just like my Mother's.

the day my son was born
Happy Mother's Day, Mum. I love you.